
Techniques
The embroidery stabilizer cheat sheet
Cutaway, tearaway, washaway, topping, no-show mesh, and a sticky backing each belong on a different fabric. Tearaway alone under a polo is a common failure. Match the sheet to the blank in your hand before the hoop closes on the order.
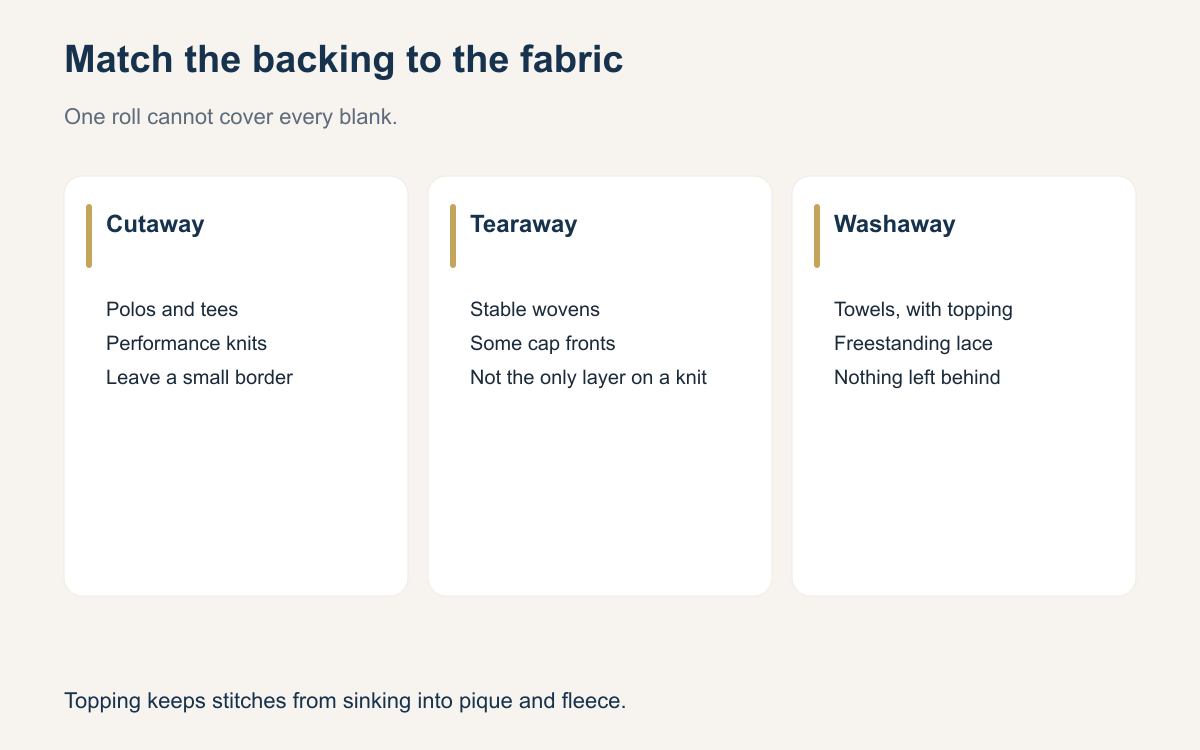
Backing is the part of the sew the customer never ordered and the part you feel when it is wrong. A logo that ripples, a neckline that shows a pale square, or a towel that stays stiff after a wash usually traces back to the sheet under the needle. You do not need a dozen kinds of stabilizer. You need the one that matches the fabric on the table, and you need to trim it so the garment still feels like a garment.
Shops get into trouble when one roll lives beside the machine and every blank gets that roll. Canvas, pique, mesh, and terry do not share a backing. The set below is what most production floors actually reach for. It is shop practice, not a rule from a mill. Use it as a starting match, then confirm on a scrap when the fabric is unfamiliar.
Cutaway for knits and performance wear

Knits and performance shirts move. A cutaway stays in the garment and spreads the stress of the stitches so the logo does not gather the fabric into rings. Use it on polos, athletic jerseys, stretch tees, and any blank with elastic in the knit. Cut the piece larger than the design, sew, then trim close enough that the edge of the stitching is not the edge of a board, and leave enough that the stitches still have support.
If the cutaway is heavier than the shirt, the chest feels like a patch. Step down in weight before you step down to tearaway. When you are unsure, sew two scraps. The sample that still drapes after you stretch it is the one for the order.
Tearaway for stable wovens
Tearaway belongs on fabric that will not stretch away from the stitches after the extra backing is gone. Canvas, denim, a stable twill, a heavy apron, and a bag that is already firm are the usual yes. You hoop it, you sew, you tear the surplus away, and the woven holds the design. That is the job this sheet is good at. It is fast to remove, which is why it gets used on blanks that cannot live without support.
Tearaway alone on a polo is a common failure. The pique feels steady in the hoop, then the shirt comes off, the knit relaxes, and the logo ripples because the support left with the tear. Save tearaway for wovens that stay put after the sheet is gone.
Washaway for freestanding work and some towels
Washaway, the kind that dissolves in water, is for work that cannot keep a permanent backing. Freestanding pieces are the clear case. The design has to become its own cloth after you rinse the stabilizer out, so the stitch plan has to be dense enough to hold together. If the tracing is thin, the patch falls apart in the rinse and you learn that washaway was never a substitute for a real fill.
Some towels use washaway when a leftover cutaway would show beside a name or feel like a card under the terry. You still need enough stitching to survive a wash, and topping if the pile is tall. Do not put washaway under a polo. It leaves on the first wash. If the fabric stretches, washaway is the wrong sheet.
Topping for pique, fleece, and terry
Water-soluble topping is not backing. It sits on the face of the fabric so the stitches you see do not sink into a pile or a texture. Pique, fleece, and terry are the usual reasons to reach for it. Without topping, a satin column drops into the ribs or the loops, and a light thread looks broken even when the file is sound. The customer sees gaps. You see a texture that was taller than the stitch.
Hoop the topping with the garment. Tear off the surplus, then dampen what is left in the letters. Topping does not replace cutaway on a knit. A tall pique often needs both: cutaway underneath and topping on the face. If you only stock one, the stitches either sink or the shirt puckers.
No-show mesh when cutaway shows
A heavy cutaway that shows at the neck, through a light shirt, or past the collar band is a finished-goods problem. The stitches can be flat and the job can still look unfinished when someone opens the collar and sees a block of backing. That is when a lighter no-show mesh cutaway earns the space on the rack. It is still a cutaway. It still stays in the shirt. It is sheer enough that a light knit does not advertise it.
Use no-show mesh on thin tees and any knit where the design sits close to a neckline. Do not use it under a huge dense fill. Mesh has a limit. If the design is large, step up in weight and trim so the sheet does not peek.
Sticky backing for awkward items
Some items do not want a hoop around the cloth. A pocket, a collar, a small bag, a sleeve that is already a tube, a zipper that sits where the ring wants to close. A sticky or adhesive stabilizer lets you smooth the fabric onto a sheet without dragging it drum tight, and it lets you hoop the backing while the item floats. The cloth stays where you stuck it. The ring does not have to swallow the whole garment.
Lay the fabric down without stretching it. Adhesive does not replace underlay or the right weight. Structured caps usually want a cap frame and cap backing, though a light adhesive can keep a slick panel from walking. If the item cannot sit flat, fix the hold before you blame the thread.
- Polo and other pique knits: cutaway underneath, water-soluble topping on the face, and never tearaway alone.
- Performance wear and stretch tees: cutaway, and a lighter no-show mesh when a heavy sheet shows at the neck.
- Stable wovens such as canvas, denim, and firm twill: tearaway, torn away after the sew.
- Freestanding designs: washaway that you rinse out, with stitching dense enough to hold itself.
- Some towels: washaway where a permanent sheet would show or feel stiff, plus topping on a high pile.
- Fleece and terry: water-soluble topping so stitches sit on the pile, and backing chosen for how much the cloth moves.
- Light knits near a collar: no-show mesh cutaway, trimmed so it does not peek past the band.
- Pockets, collars, and other hard-to-hoop pieces: sticky or adhesive stabilizer, fabric laid on without stretch.
Write the match on the work order before the hoop closes. Name the fabric, the backing, the topping if you are using one, and who trims the sheet. A cheat sheet on the wall only helps if the person hooping looks at the blank instead of at habit. The next time a sew ripples or a neckline shows a square of backing, change the sheet first. Open the file second.
A question for the group
Which backing did a bad sew-out force you to start stocking, and what fabric was in the hoop that day?